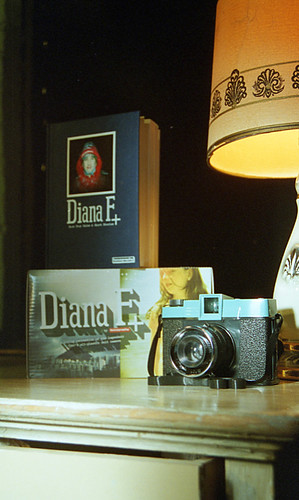
"The Diana camera is a plastic-bodied box camera utilizing 120 rollfilm. It takes twelve 6×6 cm photographs using a simple plastic meniscus lens. Originally marketed as an inexpensive novelty gift item, the Diana was later used by professional photographers to take soft focus, impressionistic photographs somewhat reminiscent of the Pictorialist Period of artistic photography, but utilizing contemporary themes and concepts" http://en.wikipedia.org/wiki/Diana_camera
FPP Video showcasing the DIANA…
The Film Photography Podcast is giving away a DIANA+ camera courtesy of our friends at Lomography.com!
Listen to our most recent episode! Download, Stream, iTunes, Zune or Stitcher (or listen below) http://filmphotographypodcast.com/ Episode 28 / February 15, 2011
BUT THAT's NOT ALL! When Film Photography Podcast listener Ryan heard that we were giving away a brand new DIANA + camera, he donated his 35mm Diana Back to sweeten the deal for the winner! Thanks, Ryan!
below - Ryan's 35mm back for the Diana +
To win the Diana this contest, send your name, mailing address (and tell us a little about your film photography) to FilmPhotographyPodcast (at) gmail.com
Entry deadline is February 22, 2011.(10am Eastern Standard Time) Only one entry per person, please. NOTE: your e-mail header, note the item (i.e. Diana Camera Giveaway)
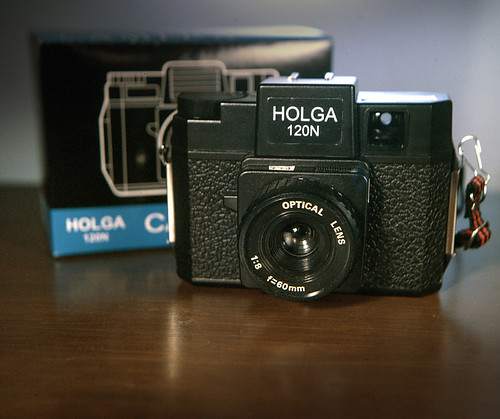
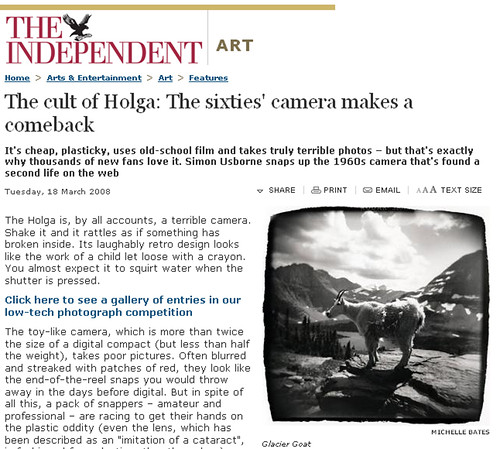
It’s easy to blow-off the Holga 120n as a cheap plastic camera but hard to ignore the wonderful images it produces.
“The Holga is a common medium format 120 film toy camera, made in China, known for its low-fidelity aesthetic. It is extremely popular among teenagers. The Holga camera was designed by T. M. Lee in 1981, and first appeared outside China in 1982 with its appearance in Hong Kong. At the time, 120 rollfilm in black-and-white was the most widely available film in mainland China. The Holga was intended to provide an inexpensive mass-market camera for working-class Chinese in order to record family portraits and events. Within a few years after the Holga's introduction to foreign markets, some photographers began using the Holga for its surrealistic, impressionistic scenes for landscape, still life, portrait, and especially, street photography. These owners prized the Holga for its lack of precision, light leaks, and inexpensive qualities, which forced the photographer to concentrate on innovation and creative vision in place of increasingly expensive camera technology.” - http://en.wikipedia.org/wiki/Holga
Reports of “Holga magic” is not new. The mighty Holga has been in the media for over a decade, never failing to make an impression
The most famous image here in the US is David Burnett’s Al Gore 2001 campaign shot. Said Washinngton Post writer Frank Van Riper (of the Holga) - “a Chinese-made Holga, a laughably crude toy that, in the right hands, can perform miracles of light and shadow.”
Holga images speak for themselves, proving Mr. Van Riper’s statement that a camera – even a cheap plastic camera – can produce wonderful images in the proper hands. Film or digital, throw the technical mumbo-jumbo out with the bath water…cameras do not make an image creative…people do.
Celebrating the Holga 120 camera, I’m thrilled to showcase some fantastic images from the Film Photography Podcast FLICKR Group Pool (shot by the listeners of The Film Photography Podcast).
FPP is giving away a Holga! FPP listener Jason donated his classic Holga 120n camera. We’re giving away this gently used camera to one lucky winner on March 1, 2011.
To enter this contest, send your name, mailing address (and tell us a little about your film photography) to FilmPhotographyPodcast (at) gmail.com
Entry deadline is February 22, 2011. Only one entry per person, please.
Missed this contest? Tune in to The Film Photography Podcast. We give away film-related items monthly!
About the Film Photography Podcast Launched in October of 2009, the Film Photography Podcast is a 90 minute, bi-weekly Internet radio program, exploring a wide range of topics relevant to the experienced and aspiring photographer using film as a medium. Hosts Michael Raso and Duane Polcou enthusiastically dissect and debate the pros-and-cons of film formats, do-it-yourself techniques, digital technologies, and vintage and contemporary cameras and accessories in a thorough, informative and casual manner. Regular features include Camera tests and reviews, “book of the month”, interviews, a listener-generated Q&A, and film-related giveaways.
Produced in the United States, the Film Photography Podcast is broadcast around the globe via iTunes and direct stream from http://www.filmphotographypodcast.com
Spotlight on the Kodak Pony 828 camera, D76 BW Developer, Listener Print Exchange, Sprocket hole Photography PLUS three camera giveaway and more!!! Hosted by Michael Raso with Duane Polcou and John Fedele.
“The Gnome Pixie is a box camera with a flip-up sports-finder, made in Gt. Britain, with an almost cubic, crinkled black enamelled metal body. Format: twelve 6x6cm images on 620 film. Simple shutter, I & B only.” http://camerapedia.wikia.com/wiki/Gnome_Pixie
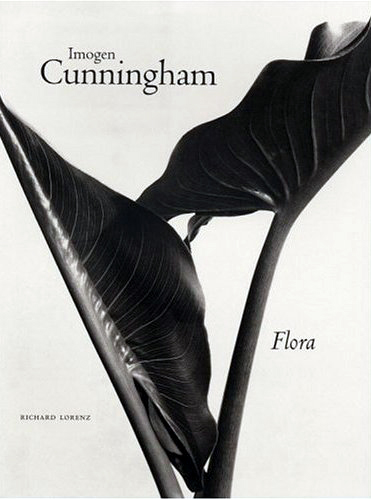
BOOK OF THE MONTH Imogen Cunningham’s FLORA
Imogen Cunningham (April 12, 1883 – June 24, 1976) was an American photographer known for her photography of botanicals, nudes and industry. http://en.wikipedia.org/wiki/Imogen_Cunningham
“Vivian Maier (February 1, 1926 – April 21, 2009) was an American amateur street photographer who was born in New York but grew up in France, and after returning to the U.S., worked for about forty years as a nanny in Chicago. During those years she took about 100,000 photographs, primarily of people and cityscapes most often in Chicago, although she traveled worldwide, taking pictures in each location. Her photographs remained unknown and mostly undeveloped until they were discovered by a local historian in 2007. Following Maier's death her work began to receive critical acclaim. Her photographs have appeared in newspapers in Italy, Argentina, and England, and have been exhibited alongside other artists' work in Denmark and Norway; her first solo exhibition is running at the Chicago Cultural Center from January to April 2011.” http://en.wikipedia.org/wiki/Vivian_Maier
What is a print exchange? It's really just what it sounds like. After signing up, you are randomly assigned someone to send a print to and someone else is randomly selected to send you a print.
Last day to signup to the FPP Print Exchange #2: Feb 17, 2011
Join Flickr.com – Join the Film Photography Podcast group on Flickr.
A few simple rules: 1. Join the FPP Print Exchange #2 on this tread, it's as easy as saying, "I'm in."
2. If you join the FPP Print Exchange #2, you agree you will send a print—this includes the possibility of international postage. If possible, it is suggested to include tracking on your print shipment.
3. What's considered a print? Prints can be from any analog photography format (instant photography included), but can be printed photographically OR digitally from a scanned file. For the FPP Print Exchange #2 there are no size limits, pick the size that best fits your budget and image (5x5, 5x7, 8x10, 8.5x11, you name it). You just need to send a print; you don't need to matt or frame it.
4. Communication is key. Once you find out who you're exchanging prints with (both who you are sending a print to and who will be sending one to you) get in touch with Flickr mail (you'll need to give your address to the person sending you a print) and stay in touch. Let the person know when you ship out the print, share any tracking information, let the person sending you a print when the print arrives, drop them a line if it doesn't show up. If you run into any problems at all, reach out to me.
5. Share some more. Post your print to this thread when you send it—obviously this means the print you send needs to be on Flickr (pick a photo already in your photostream or add the photo to your photostream). Podcast Host Michael Raso will create a gallery and include the images on the Podcast blog, so images must have URL link enabled—to facilitate that end, please add a link to the image you will be sending to this thread.
6. Stick to the deadlines.
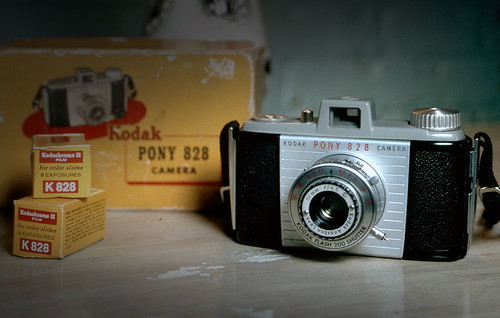
FPP Featured Camera – KODAK PONY 828 CAMERA
The Kodak Pony 828 camera was made from 1949 until 1959. It featured a retractable lens mount with a four speed Flash 200 shutter and Anaston 51 mm f/4.5 triplet lens and came with a fitted leather case. The body was made of bakelite, which was a very common camera body material at that time and while the initial version of this camera used 828 film, the four later versions were adapted to use 135 film.
828 Film “828 is a film format for still photography. Kodak introduced it in 1935, only a year after 135 film. 828 film was introduced with the Kodak Bantam, a consumer-level camera. Kodak Pony 828, Kodak's last 828 camera in the US.
The 828 format uses the same basic film stock as 135 film (standard 35mm film), but the film lacks the sprocket holes of 135. The standard image format is 40 × 28 mm. This provides a 30% larger image compared to 135's standard 24 × 36 mm, yet on the same film stock. Because Kodak targeted 828 at a lower-end consumer market, the film was much shorter, at a standard 8 exposures per roll. 828 film originally had one perforation per frame, much like 126 film [1]. Unlike 135 (a single-spool cartridge film) or 126 (a dual-spool cartridge film), 828 is a roll film format, like 120 film. Like 120, it has a backing paper and frames are registered through a colored window on the back of the camera (except on the original folding Bantams, where images were registered with an index hole).” http://en.wikipedia.org/wiki/828_film
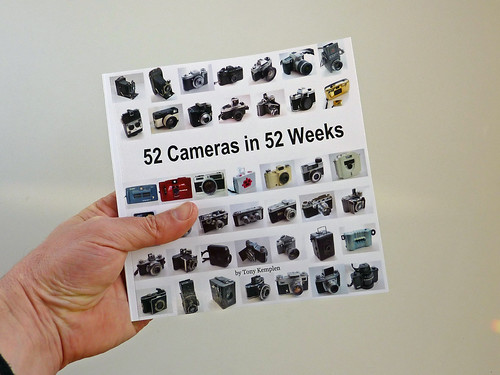
FPP Listener Tony Kemplen publishes book – 52 CAMERAS IN 52 WEEKS
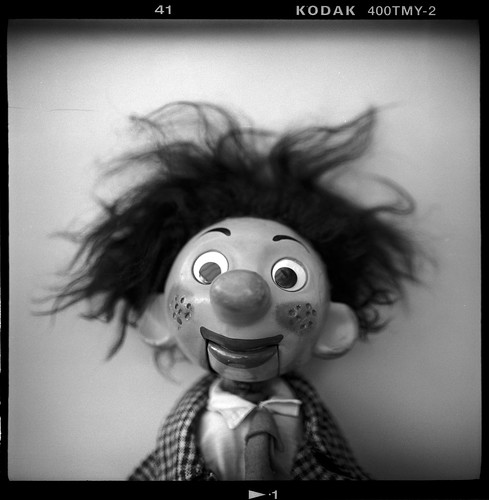
above: “Mop” by Tony Kemplen - Taken with a Kiev 60 medium format camera in week 14 of his 52 film cameras in 52 weeks project. Kodak 400TMY-2 film, developed at home in Ilfosol 3.
Tony says: “I've made a Blurb book about the project. This is the cover, inside there is a double page spread for each week of the year, plus a brief introduction and some extras, making 120 pages in all.”
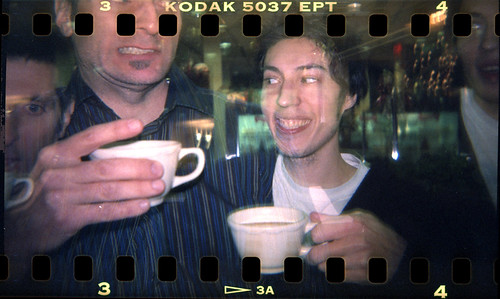
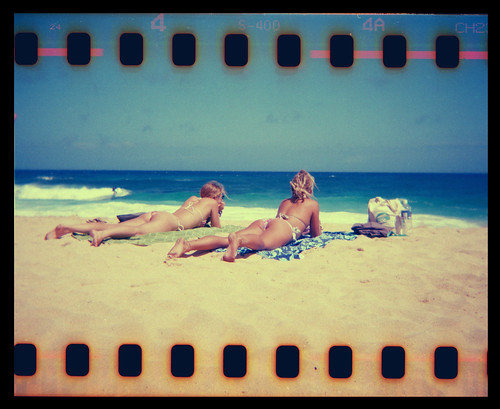
Above: “sprocket hole photography” using the Kodak Pony 828 camera. Image by Michael Raso Below: “Xpro Coffee Break” 35mm in the Holga 120 camera
“Sprocket hole photography is a style of photography that exposes the full width of 35 mm film, creating a photograph punctuated by the "sprocket holes" (perforations) along the edges of the film. It is part of the lo-fi photography movement. Usually, this style involves the use of a modified medium format camera, since a 35 mm camera ordinarily will not expose the edges of the film.” http://en.wikipedia.org/wiki/Sprocket_hole_photography
Sprocket Hole adapters (35mm to 120, 620 and other formats) can be purchased from Sprocket Hole Revolution. http://sprocketholerevolution.com
FPP CAMERA / FILM GIVEAWAYS – Winners announced March 1, 2011
We’re giving away a DIANA+ camera courtesy of our friends at Lomography.com!
To enter this contest, send your name, mailing address )and tell us a little about your film photography) to FilmPhotographyPodcast (at) gmail.com
Entry deadline is February 22, 2011. Only one entry per person, please. NOTE: If you are entering more than one contest, please send a separate e-mail for each item. In your e-mail header, note the item (i.e. Diana Camera Giveaway)
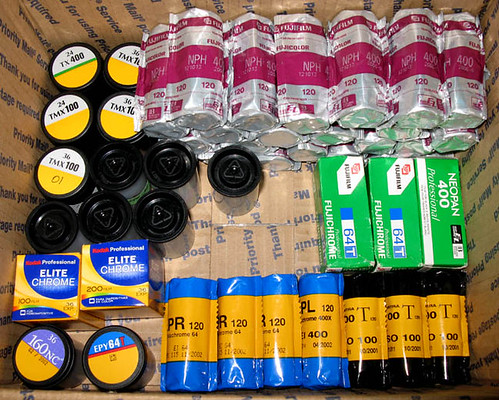
Our awesome listeners have been sending us 35mm and 120 roll film. Every month we’re giving away a roll of film.
To enter this contest, send your name, mailing address and tell us a little about your film photography) to FilmPhotographyPodcast (at) gmail.com NOTE: If you are entering more than one contest, please send a separate e-mail for each item. In your e-mail header, note the item (i.e. Diana Camera Giveaway)
OLYMPUS TRIP 35 camera giveaway
FPP Superfriend Ian Cook has donated an Olympus Trip 35 camera and flash. We’re giving away this package to one lucky winner on March 1, 2011.
To enter this contest, send your name, mailing address )and tell us a little about your film photography) to FilmPhotographyPodcast (at) gmail.com
Entry deadline is February 22, 2011. Only one entry per person, please. NOTE: If you are entering more than one contest, please send a separate e-mail for each item. In your e-mail header, note the item (i.e. Diana Camera Giveaway)
HOLGA 120n camera giveaway
FPP listener Jason donated the classic Holga 120n camera. We’re giving away this package to one lucky winner on March 1, 2011.
To enter this contest, send your name, mailing address )and tell us a little about your film photography) to FilmPhotographyPodcast (at) gmail.com
Entry deadline is February 22, 2011. Only one entry per person, please.
NOTE: If you are entering more than one contest, please send a separate e-mail for each item. In your e-mail header, note the item (i.e. Diana Camera Giveaway)
Thanks for listening to FPP. Next show in two weeks! Michael Raso
Launched in October of 2009, the Film Photography Podcast is a 90 minute, bi-weekly Internet radio program, exploring a wide range of topics relevant to the experienced and aspiring photographer using film as a medium. Hosts Michael Raso and Duane Polcou enthusiastically dissect and debate the pros-and-cons of film formats, do-it-yourself techniques, digital technologies, and vintage and contemporary cameras and accessories in a thorough, informative and casual manner. Regular features include Camera tests and reviews, “book of the month”, interviews, a listener-generated Q&A, and film-related giveaways.
Produced in the United States, the Film Photography Podcast is broadcast around the globe via iTunes and direct stream from http://www.filmphotographypodcast.com
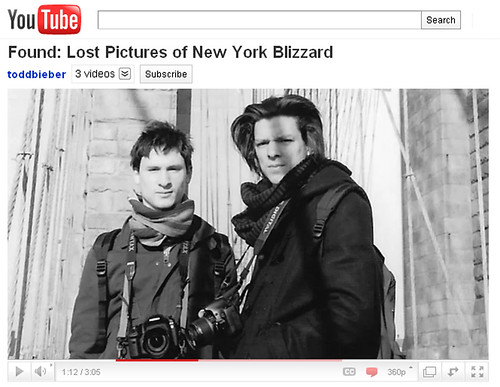
In January, New York filmmaker Todd Bieber found a roll of film in Brooklyn’s Prospect Park. With no identification on the film, Todd decided to go on a quest to find the owners of the soon-to-be-lost memories. He did so by doing what he does best – making movies.
After the unexpected global attention to Todd’s video, he recently posted this update on You Tube.
Todd writes and directs videos - mostly comedy and documentary, or some combination of the two. He is currently the guy in charge of UCB Comedy, the video arm of Upright Citizens Brigade.
Launched in October of 2009, the Film Photography Podcast is a 90 minute, bi-weekly Internet radio program, exploring a wide range of topics relevant to the experienced and aspiring photographer using film as a medium. Hosts Michael Raso and Duane Polcou enthusiastically dissect and debate the pros-and-cons of film formats, do-it-yourself techniques, digital technologies, and vintage and contemporary cameras and accessories in a thorough, informative and casual manner. Regular features include Camera tests and reviews, “book of the month”, interviews, a listener-generated Q&A, and film-related giveaways.
Produced in the United States, the Film Photography Podcast is broadcast around the globe via iTunes and direct stream from http://www.filmphotographypodcast.com
Alright, so you've got a camera, you're taking nice pictures, and now you'd like to have the rest of the world have a look at your work. What now?
As of January 2011, the image sharing options are nearly endless. You've got: Flickr, Picasa, Photobucket, Facebook, Tumblr, Instagram, The Best Camera, SmugMug, Windows Live, Imgur, and MANY, MANY more. Just checkout Wikipedia's List of Photosharing Websites for more information and links.
Joining any number of these sites is a great first step, but it doesn't necessarily guarantee that folks are going to look at your images. Remember, there's millions of other people out there doing the exact same thing, trying to stick out.
How to Make Your Images Stick Out (in a search)
Create a unique image name - DSC_12345.jpg is NOT a unique title. If it's a picture of a couple who were just engaged, try something like "John and Mary Engagement". Pretty much anything but the default title gives a better search hit chance.
Add a comment - whenever given the opportunity to give more description to an image, take it! Don't just say what the photo is, give it a quick back story, and if applicable, give a little exposure data.
Most importantly, TAG! - Whether its keywording the images in Photoshop Lightroom or adding tags on Flickr, make sure your image has tags that describe its entirety.
Just so you're not left with a vague description on tagging, here's a little more info on tags.
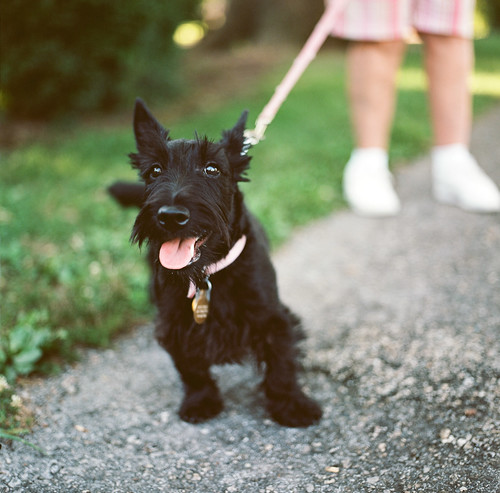
Tags are simple - think of key words that when used separately can describe your image. A picture of a golden retriever puppy holding a bone could be tagged as simply as "dog" "bone.”
Specific, but not too much - lets use the golden puppy as our example again. "golden retriever" and "puppy" could be used as additional tags, further describing your image. But "golden retriever holding bone" is too specific. People are more likely to search without the use of quotes, so separate words are searched as such.
It only takes a minute - honestly, tagging is as simple as typing a few quick sentences. If you can manage to squeeze an extra couple of hours of playing Farmville at work, I'm sure you can spend the necessary ten seconds to add image tags.
So now that you're all tagged, your images are instantly going to be a hit, right? Probably not, sorry. It takes a long time, and lot of social networking to get your images out there. Tagging is just another small part of the greater process of exposure. But if you're tagged, you're much better off being found in a search than just another image in a sea of Scan_01.tif and IMG_546.jpg.
Don't believe in the power of tagging? Try image searching "adorable corgi findlay" and see what comes up. ^__^
Launched in October of 2009, the Film Photography Podcast is a 90 minute, bi-weekly Internet radio program, exploring a wide range of topics relevant to the experienced and aspiring photographer using film as a medium. Hosts Michael Raso and Duane Polcou enthusiastically dissect and debate the pros-and-cons of film formats, do-it-yourself techniques, digital technologies, and vintage and contemporary cameras and accessories in a thorough, informative and casual manner. Regular features include Camera tests and reviews, “book of the month”, interviews, a listener-generated Q&A, and film-related giveaways.
Produced in the United States, the Film Photography Podcast is broadcast around the globe via iTunes and direct stream from http://www.filmphotographypodcast.com
"It's ALIVE!!!" FrankenHolga is born. Guest blog by Gregg B. McNeill
It all started with a Holga, my first Holga (you always remember your first). When I bought it almost 10 years ago, I had no idea that it would be one of many, nor did I realize that it would go through a transformation into what would become one of my favorite cameras ever.
The first incarnation was the removal of the shutter and lens assembly and the installation of the .0059" pinhole. To distinguish the pinhole version in my bag, I painted the top "safety yellow". It stayed in that configuration for about 8 years. I took some amazing images with it.
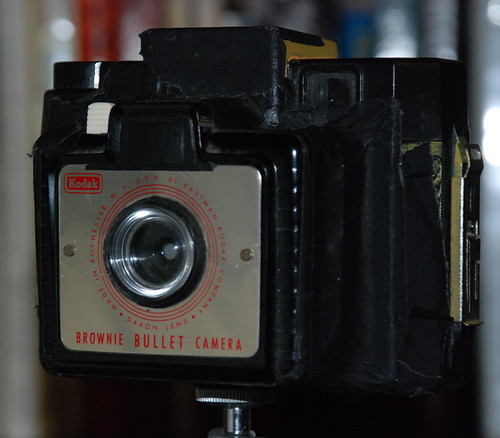
But, alas, creative boredom being what it is... I was admiring a recently acquired Brownie Bullet. I was intrigued. I wanted to use it, but I needed a few more metal take-up reels to make it work. What I really wanted was a 120 back for it. This got me thinking about what I wanted from the Bullet. It was the lens.
I estimated the Holga's focal distance from the lens to the film plane with a ruler and put a mark on the Brownie body. Cutting the Bakelite plastic Bullet down to size with a Dremmel Tool was a very loud and messy process. I had to carve away some of the Holga as well. I secured what was left of the Bullet to the hacked Holga body with black paper tape. I had to tape over the Brownie's periscope eyepiece as well.
I assumed the Bullet's shutter was roughly 1/60th to 1/100th of a second. As a quick and dirty test (instead of potentially wasting an entire roll of 120 film), I prepped some photo paper and exposed some paper negatives, which I contact printed to check for exposure and focus. The relative sharpness of the image and the soft edges amazed me.
The resulting square image was a bit smaller than the standard Holga 6x6 image. The image was so much smaller, in fact, I wondered if I could get 16 images out of the roll. On a trek to a local market, FrankenHolga created a wonderful montage by perfectly connecting all of the images on the roll edge to edge. A FrankenHolgarama.
The addition of a Polaroid back added to the fun, versatility and the name, thus becoming a FrankenHolgaroid.
“empty metro car” - multiple exposures with the FrankenHolga
“Vancouver shore portrait”
“Nathan and Keith at The Rugby”
I’ve been, needless to say, very pleased with the results of this ongoing experiment. I never expected it to work, let alone become one of my favorites. FrankenHolga continues to amaze and delight me with its unique outlook on the world. Both of its viewfinders are useless, leaving FrankenHolga to determine what it wants to show me. Giving up the control to a camera you trust has been a great release for me. I love the images and the reaction I get from people who see FrankenHolga for the first time.
So get out there and hack up some of those classic cameras gathering dust on your selves. They really would rather be working anyway, right? Just ask them, they'll tell you.
Gregg B. McNeill is a Filmmaker and Photographer currently living in Scotland, on the Isle of Bute. He runs a production company called Big baby Productions Ltd. shooting documentaries, features and music videos.
Launched in October of 2009, the Film Photography Podcast is a 90 minute, bi-weekly Internet radio program, exploring a wide range of topics relevant to the experienced and aspiring photographer using film as a medium. Hosts Michael Raso and Duane Polcou enthusiastically dissect and debate the pros-and-cons of film formats, do-it-yourself techniques, digital technologies, and vintage and contemporary cameras and accessories in a thorough, informative and casual manner. Regular features include Camera tests and reviews, “book of the month”, interviews, a listener-generated Q&A, and film-related giveaways.
Produced in the United States, the Film Photography Podcast is broadcast around the globe via iTunes and direct stream from http://www.filmphotographypodcast.com
In the last few weeks there has been an explosion of interest in home development from listeners of The Film Photography Podcast. After 16 months and 27 episodes I'm surprised that it has taken this long for us to launch the "Darkroom Corner" segment led by FPP co-host Duane Polcou.
I've even jumped on the bandwagon and just ordered a home development kit from Freestyle Photographic. It's been a long time since I've developed my own BW negs so the recent input from FPP listeners has been very, very helpful. Plus, when I have a question, I just shoot an e-mail out to one of the FPP listeners for a quick, speedy response.
The Film Photography Podcast has become a really awmazing community of folks over the last year and what better way to start a creative project than with film friends!
Today's edition, contributed by long-time FPP listener Dan Domme is a detailed step-by-step of the home development process. Thank you, Dan. I hope this entry is as helpful to others as it's been helpful to me!
*****************************
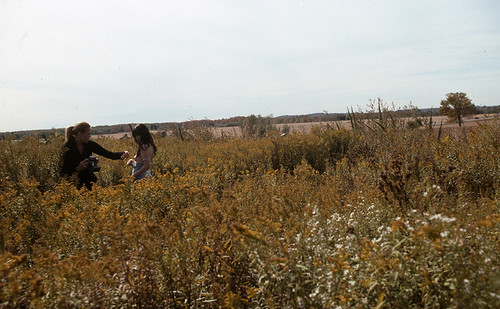
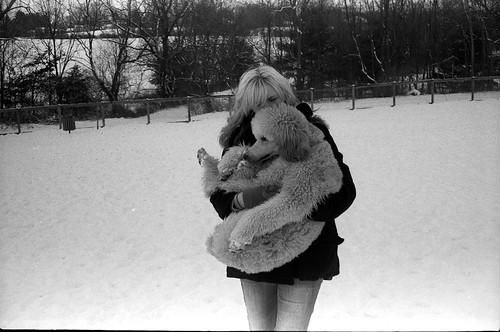
Image by Dan Domme - developed in Rodinal
Greetings, FPP listener! You say you’re interested in developing your very own black and white film! Of course, there are guides out there for developing your own film, some even penned by our own FPP listeners. But when it comes to learning something new, it never hurts to have more fresh perspectives. I’m Dan Domme, and I’m writing this guide just so you’ve got all the information at your disposal before you start developing 35mm or 120 film. I think that you’ll have a lot of fun developing, and it can be a real money-saver as opposed to shooting color. Note: in my instructions that follow, I will keep referring to a Paterson Super System 4 Tank, which is what I use to develop my film. If you decide not to use a steel tank, your plastic tank may vary.
Step 1 - Equipment Checklist
Unless you have the required equipment, you could risk ruining your film before you get a chance to develop it. I’ll list everything you’re going to need here, with the giveaway items marked with an asterisk:
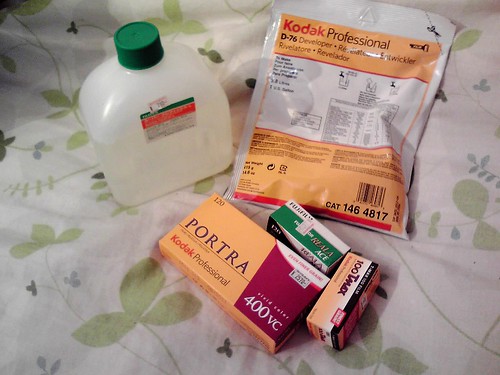
- developer - I prefer to use a liquid developer, since powders can produce flying particles when you mix them, but that’s just me. - stop bath - fixer - a pitch-black room or a light-tight changing bag. I’d recommend a bag if you can get one. - developing tank, plastic or steel. More about plastic vs. steel in a second. - appropriate reel for the tank. - plastic for plastic and steel for steel. - graduated cylinders or other measuring device, about 700-800 mL. (I'd recommend eventually getting one for each chemical you use.) - a reliable timer, such as a stopwatch - 2 or more chemical storage bottles (usually black or dark brown plastic, get one for each chemical other than wetting agent, and don’t get one for the developer if you’re working from a liquid rather than powder.) - black clamp-style paper clips or equivalent to hang strips for drying. - a thermometer (dial or digital) is also highly recommended. - hypo wash (optional but not recommended) - wetting agent (optional, recommended if you have hard water)
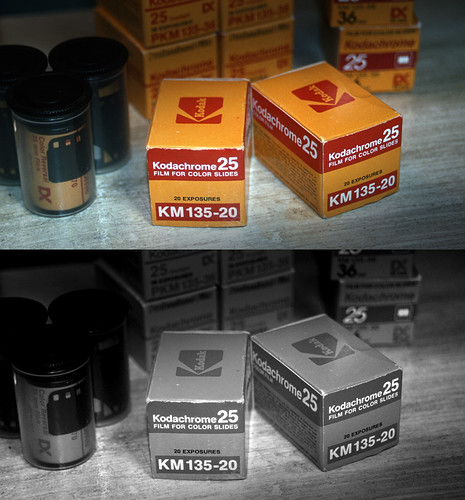
Notes: virtually anyone’s fixer will suffice, and if you’re going to buy stop bath, I’d recommend “indicator” stop bath, which changes color when its pH gets too high to be useful. For developers, I prefer either Kodak HC-110 or Agfa Rodinal, which is currently available as Adox Adonal. Both are liquids. D-76 is a powder developer, which is also a great choice for a newbie. I use Zonal Pro stop bath and fixer, but Kodak also makes great stop bath and fixer.
Before buying tanks and reels, here are some key differences. Steel tanks generally take less chemistry per roll than plastic, and they don’t have to dry completely before you use them again. However, it can be more difficult to load, according to who you speak to, and you need different reels for each size of film. I use plastic for the following reasons: they’re just as easy to load as steel; they are less susceptible to temperature changes; they don’t have to be flipped to agitate, and you can fill and drain the tanks faster. It’s also less likely that you’re going to put an image-crippling kink in your 120 roll film if you use a plastic reel.
Step 2 - Chemical Preparation
First and foremost, make sure you check the instructions on the chemicals you buy. Usually they're pretty straightforward, but if you have any questions, do the magic series of steps to find your answer: (1) Use “Da Google” to see if you can find an answer. Usually links to threads on photo.net or apug.org are helpful if they’re not overly technical. (2) Don’t be afraid to ask the FPP group on Flickr - we all try to be as friendly and as helpful as we can! (3) If you’re still stuck, try asking over at apug.org - if you tried your research and take your time when writing your question, I’ve found everyone to be quite helpful, even if there are a lot of different opinions. But anyway...
Mix up the stop bath and fixer and store them in your chemical bottles. When mixing the fixer, make sure you mix for the film dilution, which is stronger, rather than the print dilution. If you’re choosing to use hypo wash, which I have not used before, then you may have to dilute it and store it as you would the stop bath and fixer. You can dilute and store Kodak’s wetting agent, but I only put a few drops in my final round of rinse water. As always, check the instructions for your chemicals if you’re not sure.
If you're using HC-110 or another liquid developer from concentrate, you will likely not need to use a chemical storage bottle for it, since you'll be dumping it down the drain afterward. Stop Bath and Fixer should be re-used until they’re exhausted. I believe hypo wash may be reusable, and the wetting agent should also be reusable if you’re deciding to mix it all at once. Check all the instructions.
Step 3 - Loading the Film
Here's where the fun begins. You might want to take a second to see if your reel is adjustable, such as the Paterson Super System 4. The reels for that system are sold as 35mm, but you can twist them apart to unlock them, readjust the size, and use them for 120 film. Make sure your reel is set to the appropriate size before tossing it in the changing bag (or turning the lights out!)
If you’re working with 35mm film, clip the thin part of the leader so that you’re starting with the full 35mm width of the film, and round the corners just a little bit. If you don’t have access to your leader, then you’ll have to do these steps in the darkroom or changing bag, which can be a hassle. I’ve found I can just pry the felt opening apart to get to the film, but be careful about sharp edges! Other people use a bottle cap opener on one end of the 35 mm canister.
In your changing bag, put your film spool(s), your tank, and your reel(s). Then zip it up and stick your hands in the sleeves. (If you're in a darkroom, just make sure the room is now completely dark.) For 35mm film, I just pull all the film out of the canister, careful to handle it by the edges, and clip it at the canister once I can’t pull any more out. For 120 film, what I do is slowly unravel the spool. for a while you will only be unspooling paper, but soon the film layer start to unroll. Start collecting this into a roll, using your fingertips to hold it along the edges. At the opposite end of the film, there is masking tape attaching the paper to the film. I detach this from the paper and fold the sticky side over so that it forms a tab on the end of the film. Make sure no sticky parts are exposed, or else you might get some gunk on your film. In either case, now you have a complete roll of film in your hands.
Plastic reels load from the outside in. There are some tabs on the reel which I call thumb rests. You feed the first inch or so of film (the end without the tape) past these tabs and the ball bearings in the reel. Then, you can twist the reel back and forth, with your thumbs on the thumb rests to prevent jamming, to automatically feed the film into the spiral. If you have some extra 35mm or 120 film you don’t mind wasting, it’s VERY helpful to try this in the light first.
Steel reels are different - they load from the inside out. At the center of the reel, there is a spring-loaded clip (or even two teeth to grip the sprocket holes on some 35mm reels) which you use to hold one end of your film. Then, holding your film straight, but ever-so-slightly curved, like a celery stick, rotate the reel so that it gently pulls the film from your hand. Typically I hold the reel in my left hand and the film in the right hand.
Once you've loaded the reel, put it in the tank. Plastic reels usually go on a center post, which forms a light seal with the funnel top, and then covered with a lid. Steel tanks have the light trap built into the lid. Once the tank is closed up, you're safe from light and can take the tank to the kitchen sink.
Step 4 - Development Times
What you need to figure out now is how long you're going to develop your film. Different speeds, films, and developers all have different times, and it can be a real hassle keeping them straight.
So go here: http://www.digitaltruth.com/devchart.php - This is the Massive Development Chart, and it has most of the possible combinations of films and developers. Select what film and developer you have on the left hand side, and you'll get a table that probably shows you different dilutions and ISOs. You can mix your dilution down to either conserve your developer or create subtle tonal effects. In general, though, more dilute developers give you more pronounced grain. Select a dilution and ISO combination, and read the time (in minutes) from the 35mm or 120 column - they should be the same 99% of the time. Also, check to see if there are any notes to read in the last column. If there are no notes, assume constant agitation for the first minute, and 10 seconds every subsequent minute (more on this later). (5 seconds of agitation every 30 seconds should also work)
Stop bath times are usually 1 minute with constant agitation, and fixer times are usually 5 minutes: constant agitation for the first minute, and 10 seconds every subsequent minute. Hypo wash usually takes 2 minutes or so, and I use wetting agent for a minute, both with constant agitation. Needless to say, a timer really helps.
Step 5 - The Chemical Process
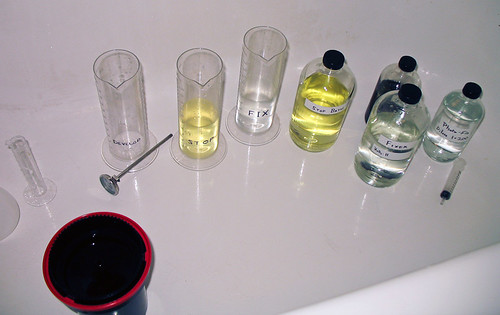
Measure out your required chemicals in your 3 graduated cylinders, which I have labeled in Sharpie marker as "Develop," "Stop," and "Fix." If you don’t have three graduated cylinders, use one to measure, and transfer the contents to large cups you’re not planning on using for drinking. It is important to have all three liquids ready to go, since this is a time-sensitive process.
Paterson tank volumes are printed on the bottom of the tank. I think it’s 300 mL for a roll of 35mm film (600 for 2 rolls) and 500 mL per roll of 120 film. Steel tanks hold 8 or 16 oz, depending on whether it’s a 35mm or 120 tank. Note that a steel 120 tank will also take 2 35mm reels.
Open the tank while keeping the light-tight part of the lid on. Patersons have a thin black plastic Tupperware-like cover. This is the only thing you should remove... anything else will expose the film to light. For steel reels, only take the smaller part of the cap off.
Pour the contents of the developer cylinder into your tank, strike it lightly against a counter to dislodge air bubbles, and then start agitation - if your plastic tank came with a small black plastic wand, you should be able to stick it in the center hole and twist back and forth gently to agitate. This is quicker than trying to put the lid on as quick as possible after the chemicals go in. Otherwise, replace the cap tightly, and slowly turn the tank upside down and right-side up. Go slowly, about one inversion every two or so seconds. I've found it's not terribly important how many twirls or inversions you get in every 10 seconds, just that you agitate for 10 seconds.
Developing converts the silver salt on the film which has been exposed to light into silver. This silver remains on the film throughout the developing process and as long as you have your negatives. This is why areas of the image that have been exposed to more light become darker.
Once the developer step is done, remove the cover, pour it down the drain, and immediately pour in the stop bath. Gently agitate the tank (via the stick or inverting it upside down and back upright again) for one complete minute. Then pour the stop bath back into its chemical storage bottle (a funnel helps).
Stop bath is a simple acid - usually acetic acid, which is the primary component of vinegar. Since all developers are bases - chemicals with high pH’s - stop bath makes the tank very acidic very quickly, making sure that any leftover developer on your film won’t continue to work.
It's not as important to be so immediate with the changing of fluids from stop bath to fixer, since the most time-dependent step, developing, is over. With the stop bath back in its container, you can now pour in your fixer. Treat it as you would your standard developer: one minute of constant agitation, then 10 seconds per minute until you've done a grand total of 5 minutes. Then pour the fixer back into its storage bottle.
During the fixer step, all the silver salts that didn’t get converted to pure silver by the developer are now sucked away into the fixer chemistry. This leaves the film with nothing but stable silver on the plastic film base.
Now, you'll want to wash that nasty fixer (also known as “hypo”) off your film. Typically, water is all that is needed, but if you want to be super-extra-safe, you can pour hypo wash (at the appropriate dilution) into your tank and treat it as you would stop bath - constant agitation, but give it a bit longer... around two minutes. Note that I don’t do this step myself. Hypo wash is typically used for prints, and even then only on fiber-based papers, which are harder to wash than resin-coated papers. If you’re deciding to use this hypo wash, follow the instructions and pour the hypo wash back into its storage bottle, or down the drain - whichever is appropriate.
Regardless of whether you’ve chosen to do the hypo wash step, fill the tank with fresh water and give the tank five inversions. Empty the tank, then repeat except with 10 inversions in fresh water. Then, do it again, only with 20 inversions. You are now done washing your film. This is known as the "Ilford Method." It is a pretty simple method of washing, and it uses a relatively small amount of water.
Alternatively, you can also use a force-washing hose, which you just attach to your faucet and turn on at a relatively low flow rate. It doesn’t matter how much water is moving over the film, just that it’s moving. This is done for five to ten minutes, depending on whether you are using a hardening fixer, which takes more time to wash off.
Note: If you have hard water - i.e., tap water with a lot of mineral content - you'll want to prevent film spots. This is why you have wetting agent. I use Kodak Photo-Flo, and rather than dilute the whole bottle, I use a drop or two in a final tank full of water. Your wetting agent may be different, so read the instructions. But mix the appropriate solution and treat it just like the stop bath - constant agitation for a full minute.
Finally, disassemble your tank and get to the reel. With a Paterson reel, you can twist the reel apart just like you do to adjust the reel to fit 120 film. If you have a steel reel, just unwind it from the outside.
If your fingers are clean, you can slide your index and middle finger once down the length of the film strip to "squeegee" it dry. They also sell film squeegees. This is especially important if you did the wetting agent step, since your film will have bubbles over it. I use two black paper clips to hang the film to dry overnight - one with an attached piece of dental floss to hang it to my shower curtain rod, and the other used as a weight to keep the film straight. They also sell film clips for this purpose. Just make sure you choose a dust-free environment, or else you might get spots on your negatives. If you’re in a bathroom with a shower, running it before you develop might help eliminate some of the excess dust.
The following day, or a few hours later, you can trim up the film strip and then either scan or enlarge your photos. The downside: you need a scanner or enlarger. Or, you can send the negatives to a photo lab that can make prints for you. Just be sure to contact them first to be sure they can make black-and-white prints.
Anyway, there you have it. don't hesitate to contact me on Flickr.com (username yeknom02) if anything I said was unclear or if you have more questions. I hope this was helpful, and please let me know if it was! I hope you have fun developing black and white film!
- Dan Domme
***************************
Launched in October of 2009, the Film Photography Podcast is a 90 minute, bi-weekly Internet radio program, exploring a wide range of topics relevant to the experienced and aspiring photographer using film as a medium. Hosts Michael Raso and Duane Polcou enthusiastically dissect and debate the pros-and-cons of film formats, do-it-yourself techniques, digital technologies, and vintage and contemporary cameras and accessories in a thorough, informative and casual manner. Regular features include Camera tests and reviews, “book of the month”, interviews, a listener-generated Q&A, and film-related giveaways.
Produced in the United States, the Film Photography Podcast is broadcast around the globe via iTunes and direct stream from http://www.filmphotographypodcast.com